In air to submerged
Fitting a cap with a gas torch, on five different substrates
Five open ends, ordered here from a terminal sitting in air down to an anode in saturated backfill, and only four of them ever meet the flame.
Arrived on the phrase hot cap for PVC?
A heat-shrink cap has to reach 125 °C (257 °F) to recover. The moulded PVC in the same catalogue is published with a continuous ceiling of 115 °C (239 °F), ten degrees under the number the flame must pass, so on a PVC part the substrate is what is at risk, not the cap. PVC as a cable sheath is a listed material for these adhesive-lined caps. PVC as a pipe is not, and no pipe-end chart exists to print. Full answer further down.
Gas, flame shape, and the mistake that costs you the cap
Propane is named first and butane second, and that order is worth respecting on anything larger than a cable end. A bigger, softer envelope of heat over a 460 mm (18 in) crown buys time for the wall to warm through rather than only on its face.
Set the torch for a soft blue flame carrying a yellow tip. A tight pencil flame is the wrong tool at every diameter here: in one spot and a few seconds it delivers heat the whole circumference needed spread over a minute. The wall thins, then scorches, and scorched polyolefin has already spent the memory that was going to pull it down.
Recovery is a property of the wall through its thickness, not a reading on its outer face. Movement therefore matters more than intensity, and everything below follows from that.
What the material does either side of the recovery figure
| Test description | Recorded value | Test method |
|---|---|---|
| Shrink temperature | 125 °C | IEC 216 |
| Heat shock, 250 °C for 30 min | No cracking or flowing | ESI 09-11 |
| Accelerated ageing | 120 °C for 500 hrs | ASTM D2671 |
| Tensile strength after ageing | 11 N/mm² (min.) | ASTM D638 |
| Ultimate elongation after ageing | 300% (min.) | ASTM D638 |
| Low temperature flexibility, −40 °C for 4 hrs | No cracking | ASTM D2671 |
| Continuous temperature limit, cable end caps | −40 °C to +110 °C | IEC 216 |
| Operating temperature, anode cap | −55 °C to +100 °C | IEC 216 |
Each reference in the Test method column is explained once, on what an end-cap datasheet actually proves. Values as published on the manufacturer's Heat Shrink Cable End Caps datasheet.
Six moves, in this order
The order is not a preference. Each move exists because the one before it has already made something impossible to correct.
Get the surface dry, then get it clean
Adhesive keys to a surface, not to what is lying on it. Mould release on a jacket, sawdust in the grain, weed on a crown, oil off a lug: each becomes the interface that opens two winters later. Damp is worse than dirt — a wet substrate turns the melting lining into a steam pocket.
Dry-fit the part before anything is lit
It arrives expanded and slides on cold with clearance. Confirm the open edge finishes on sound material with the whole adhesive length in contact. Choosing that size is a separate job, on the size charts.
Start on the closed end
Heat the crown, then walk the flame down towards the open edge, so recovery advances one way and drives air ahead of it. Reverse that and the rim shuts first, leaving a pocket under the crown no further heating will clear.
Circle, do not linger
Continuous laps round the part, each slightly lower than the last. Never take one side to completion and then turn to the other: heated unevenly, it recovers unevenly and takes the substrate's shape crookedly.
Stop on the bead, not on the clock
The finish is a continuous line of melted adhesive standing proud at the open edge, through the full 360 degrees. Tight-looking and bead-free means the lining never reached melt — a close-fitting sleeve resting on the substrate, which inspects clean for years while doing nothing.
Cool before anything loads it
No strain of any kind until the moulding is cold to the hand. The lining is still mobile while warm, and warm is exactly when the winch rope goes on a pulling eye or the wind finds a fresh crown.
The five substrates, ordered by how wet they get
Preparation differs far more than technique does. The torch behaves the same way on all of them; what changes is what has to come off first, and what the lining is then asked to bond to.
| Open end | Band | Taken off first | What the lining bonds to |
|---|---|---|---|
| Crimped terminal in a panel | In air | Nothing. The torch stays in the bag | Nothing. This one is a push-on moulding with no lining at all |
| Sawn pole crown | In air | Staples, tag wire, loose bark, sawdust | Dry timber, and into the cracks in the cut face |
| Sawn pile top | Splash zone | Weed, and standing water held in the checks | Dry timber, on a crown that is rarely dry when you arrive |
| Cut cable sheath | Buried | Jacket lubricant, drum grit, cutting swarf | XLPE, PVC, PILC or rubber jacket, bridging the saw ridges |
| Anode body and lead wire | Submerged | Backfill dust and handling grease on the insulation | Two dissimilar surfaces at once: anode material and wire insulation |
The anode joint is the awkward one
Every other end on that table asks the lining to bond to one material. The anode cap asks its rubber-based mastic to bond to two, at opposite ends of the same part: anode material at the wide bore, lead-wire insulation at the narrow one. The ingress rating is only as good as the weaker of those bonds, and in the field that is nearly always the wire.
So clean the insulation, and clean it past where the cap will finish. Handling grease and backfill dust are invisible at fitting and decisive afterwards, because the joint then goes into ground chosen for being electrolytically active. The manufacturer's anode cap page states the seal against both surfaces; nothing states it against a greasy one. What that costs later is on an anode bed fails at the wire.
What finished looks like
A recovered cap sits with a clean, straight lower edge, no wrinkling above it and unmarked substrate below. Brown scorch under that edge says the flame stopped moving; a wavy edge says the laps were rushed.
Cooling is the step with no visible progress and the highest skip rate, because the cap looks identical either way. The manufacturer's pole cap page carries the same instruction for concrete, timber, steel and composite crowns alike.
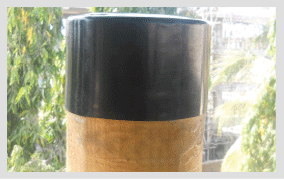
Four failures, all of them made in the first ninety seconds
Each leaves a signature you can read afterwards — useful when you are inspecting somebody else's work.
- Scorched or thinned wall. A pencil flame, or a soft one held still. The surface goes glossy, then matt brown, and the thinned patch splits at the first frost. Not repairable: cut it off and fit a new one.
- Incomplete recovery at the open edge. Patience ran out over the last 20 mm, or the work started at the open end. The rim stands proud and never touched the substrate, leaving an open annulus pointing at the thing the cap was bought to protect.
- No bead anywhere. Under-heated. The polyolefin recovered because polyolefin recovers first; the lining behind it never melted. This is the failure that inspects clean, and refusing to sign off a cap with no visible bead is the only defence.
- Strain applied warm. The bead formed and was then dragged out of position. A pulling eye is rated from 150 to 450 kg across its size range, and none of that is available until the part is cold.
Hot cap for PVC, answered properly
The phrase reaches this page from people meaning one of two things: a cap fitted with heat rather than pushed on by hand, or a cap for the end of a PVC pipe. The first is straightforward. PVC is one of four jacket materials the adhesive lining is stated to work on, alongside XLPE, PILC and rubber, so a PVC-sheathed cable takes a heat-shrink end cap and the six moves above apply unchanged.
The second is a no, and the temperatures are the reason. Recovery needs 125 °C (257 °F); the moulded PVC parts in this catalogue are published with a continuous ceiling of 115 °C (239 °F), which puts the component below the figure the torch has to exceed. There is no pipe-end size chart in the published data either, and this site does not print a chart it cannot source.
A PVC pipe end in air that needs covering against dust and knocks takes a push-on moulded cap and no heat at all. One that has to hold back a standing head of water is a pipe-sealing question, outside what this site covers. Say so to your supplier rather than accepting a cable part in its place.
Four questions that arrive alongside this one
Can a cap that has already been shrunk be taken off and refitted?
Is a hot-air source acceptable instead of a gas torch?
The cap shrank tight but no adhesive appeared. Is it sealed?
Does the substrate change the torch technique?
The decisions this procedure sits between
- Four size charts, and how to read a codeSizing happens before fitting, and it is where most rework is created.
- Closing an end where a torch is not allowedThe permit, not the part, is often the binding constraint.
- Six ways a closed end opens againInstallation is only one of the six.
- Capping a network of crowns, not one poleWhere these six moves get repeated a few thousand times.
- Closing an end at the works, before it sees weatherFitting on a bench indoors is a different job from fitting beside a duct.
Send the substrate, not only the diameter
A dimension on its own produces a size code. A dimension plus what the end is made of, and how wet it will get, produces the right one.